Making the Switch from Negative to Positive Tool Offsets

This simple switch makes life much easier because it introduces more standardization to the shop floor, reduces the burden on operators, increases setup speed and dramatically reduces the chances of human error. All of which saves time and realizes return on investment – and each additional machine helps increase the rate of return.
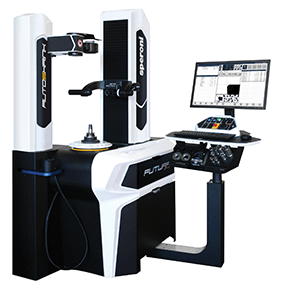
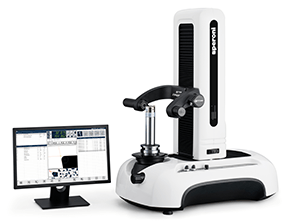
In this day and age, when the power of data and speed of automation is being realized in shops everywhere, you must adapt to stay competitive. Charles Darwin’s famous quote from his 1859 classic, The Origin of Species, puts it best: “It is not the strongest species that survive, nor the most intelligent, but the ones most responsive to change.” Put bluntly, adapt or die. A little dramatic? Maybe. But I’m reminded of this idea every time I visit a shop to help them install a new presetter: Companies are often trying something to win more work, more customers and ultimately beat their competition – in this case, by setting up tools outside of the machine in order to optimize spindle time. Often, one of the most important parts of this process is helping them understand the difference between negative to positive, or gage line, tool offsets and why it’s important. That is, traditional “touching off” of the tool in each machine to establish negative tool offsets based on the zero-point surface – the vice, machine table, workpiece, etc. – versus calibrating machines to receive the positive length of the tool, from its tip to the gage line, measured at the presetter.
We think the choice is pretty clear: adapting machines to a single presetter so they can receive positive gage lengths is superior than using all types of machine-specific negative offsets. This is the kind of change to “the way things have always been done” that can be met with some resistance, but in the grand scheme of things, it’s a relatively small and simple step that makes life much easier. This is an opportunity to introduce more standardization to the shop floor, which not only reduces the burden on operators, but also saves time and realizes return on investment – and each additional machine helps increase the rate of return. While presetters are fully capable of calculating negative gage lengths, room for error remains if the switch isn’t made to positive. Inputting the wrong machine (often called “adapters” on a presetter interface) into the presetter or miscalculating are easy mistakes for anyone to make; these simple errors can make for catastrophic crashes the require complex and costly fixes. Switching to positive gage lengths drastically shrinks the window for error.
On the time savings side of things, you can confidently move tools from machine to machine: simply enter the tool offset into the control and be ready to go. There is no need to touch off the tool again and again. The more consistent the taper styles and/or machine centers, the more time that’s saved. Once the presetter is on site and the time comes to adjust machine centers to positive gage lengths, there’s going to be variation from control to control. For example, newer machines are generally equipped to work in positive lengths. In conjunction with making sure the control is prepared, gage lines must be properly established and matched to the presetter.

In the case of HSK, Capto® or KM®, when the gage line is basically the face of the spindle, it’s very simple to match the measure with the presetter. I do, however, see a lot of variation in steep taper setups at shops where there isn’t a master calibration test bar or ball. The established gage line is often in the wrong spot, but all the programs are written to compensate, and it works. In this scenario there’s again the option to create all those different length offsets, a thousandth for this machine, two or three thousandths for another, in the presetter or, more simply, to adjust the machine to the presetter. The installation technician walks operators through these decisions and will set up the system to suit current and/or planned processes and machinery. The hope is to have the presetter working seamlessly for the shop and the team as soon after installation as possible.
Still, understanding the discomfort a change like this may cause, I recommend slowly phasing in positive gage lengths. Get one machine matched to the presetter and only preset tools for that machine. Prove it out and learn to trust the presetter. Not everyone has to start all at once either . . . that way there’s more one-on-one time to work with each team member. Whether it’s loading a program that will incorporate all the offsets or reading measurements from a sticker and typing them into the offset table, the team will get comfortable quickly. Some presetters, such as our Speroni models for example, can certainly handle calculating negative offsets and store dozens of machine envelopes, which will help shops improve their efficiency. But the simple switch from negative to positive offsets increases setup speed and dramatically reduces the chances of human error


¿Te pareció interesante o útil? Haznos saber tu opinión agregando tus comentarios o preguntas a continuación.