Send me information please
Good Measuring Is Good Machining
In metalworking, every centimeter matters. A single missed measurement or miscalculation can result in anything from poor surface finish to a scrapped part. It’s a lot to keep track of, and even more challenging when done by hand, pen and paper. But there’s no reason you can’t get a little help, and there’s plenty of it out there.
We’ll detail some of the practical measuring devices out there that not only take some of the burden off the team, but increase efficiency and prevent issues. Good measurements make setups faster, reduce recuts and identify potential spindle or holder issues before they become bigger problems. Let’s look at a few of the key areas to measure and the handy solutions available.
Spindle retention and alignment
The mating of the tool holder and the machine spindle is critical to consistent metalworking performance. Oil, coolant or debris buildup can prevent a holder from making flush contact with the spindle. And, while efficient, repeated ATC cycles can make small issues bigger by accelerating existing wear or buildup. Repeated loading can also lessen retention force—a potentially dangerous and costly situation.
Each of these issues can impact the all-important static accuracy of a machine. What’s more, these can be very difficult to manually inspect and diagnose before the issues appear on cutters or parts. BIG-PLUS spindles address many of these situations, but that’s not always an option. Luckily, there are some very easy-to-use devices that can help.
ATC Alignment Tool
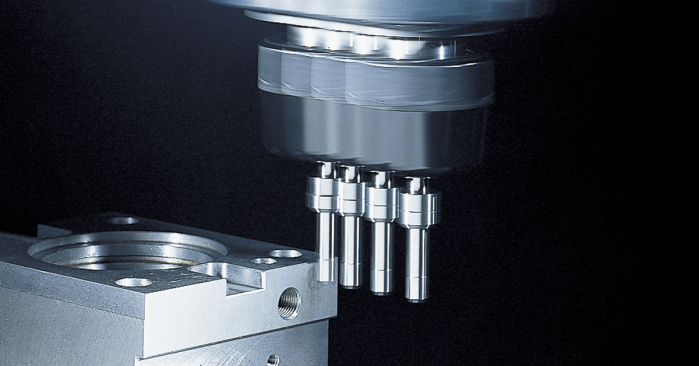
If a tool holder is loaded into a spindle improperly the chances of damaging the spindle taper and/or runout increase significantly. This arm alignment tool ensures spindles, holders and cutting tools aren’t damaged by the movements or force of the automatic tool changer.
Dyna Contact
With the help of some dye, this taper gage provides a quick visual indication of any inconsistencies in the taper surface and if tools achieve proper contact.
Dyna Force
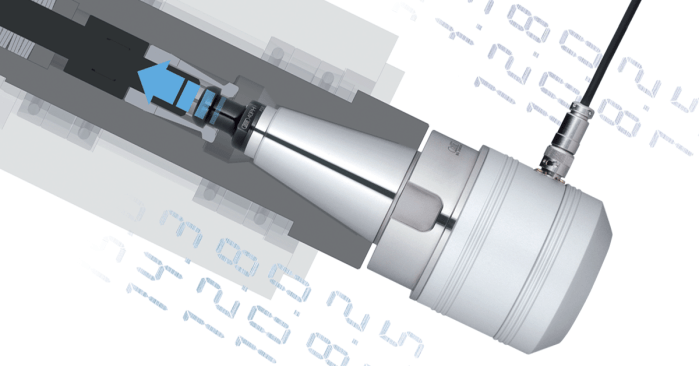
The higher the pulling force of your machine tool spindle, the better the cutting performance; it reduces chatter, is more rigid and consistent. This instrument quickly measures the pulling force a machine imparts on tool holders, alerting you if adjustments should be made sooner than later.
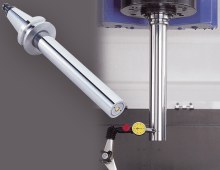
Dyna Test – Test Bar
It’s a great idea to inspect the core performance of your spindle: static accuracy and parallelism. A solid test bar with a generous stickout makes it easy to measure Z-axis movement and runout at low speeds, and to catch any small issues before they become big ones.
Runout management
Less runout pays. That’s the bottom line, and we’ve done the math to prove it. More specifically, tool life is extended and more cycles are performed faster. Identifying runout, however, and where it’s coming from is easier said than done. It often reveals itself on parts first, which is already too late. One solution is to check the runout of your spindle and/or critical tooling setups at higher RPMs. But, how?
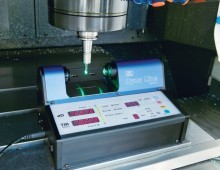
Dyna Line Portable
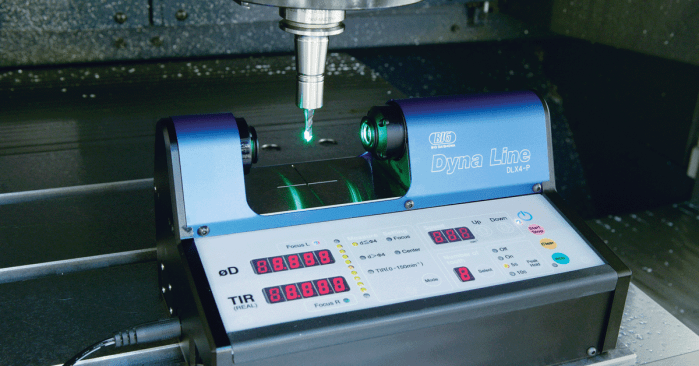
There’s no need for delicate touch-offs with this quick and easy measuring device. The Dyna Line uses advanced CMOS sensors for non-contact measurement of a tool’s absolute diameter in rotation. It’s as simple as setting the portable device on the table and spinning the cutter between linear imaging sensors.
Workpiece accuracy
It’s just as crucial for a workpiece to be located accurately as it is for a machine’s axis to move accurately. The difficulty arises when an operator has to reach a large, fixtured part’s edge or a complex crevice. All the reaching and remeasuring is valuable spindle time that’s going to waste. There are a variety of spindle-based edge and point finders for making this much easier, regardless of material or conductivity.
3D Master Red
This edge finder measures in the X, Y and Z directions. It’s also compact so that it doesn’t interfere with the part as it quickly indicates clear measurements, compensating for the radius of the stylus ball.
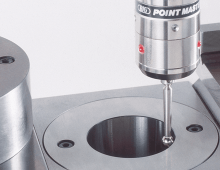
Point Master – Touch Probe
While it can be used in non-conductive settings, the Point Master is great with conductive cutting tools, machines and resin, ceramic or coated workpieces. Like the Master Red, Point Master offers three dimensions of measurement.
Accu Center – Edge Finder
This edge finder offers repeatability within 3 μm and has a hard chrome-plated stylus for long life and consistency. It’s great for all materials, but not recommended for horizontal machine tools.
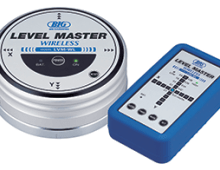
Level Master
For these measurements to be accurate and useful, there’s a machine element that needs to be accounted for. An accurately leveled table improves the machining process and makes the machine last longer. Level Master is a simultaneous, two-axis level detector that makes it easy for one operator to level tables.
Offset verification
Verifying workpiece and tool offsets is a tedious, yet crucial step in making sure a tool can successfully travel its programmed path and interact with the part. Measuring gage lengths and cutting edges on lathes or multi-axis machines can be painstaking, introduces extra steps and more room for error—especially when using unique negative offsets on each machine.
Base Master Series
This series of tool offset sensors make a big impact for how simple they are. It’s mounted on a workpiece or the table and lights up the instant the cutting edge makes contact. Not only are measurements done faster, but with repeatability of 1 μm and detection accuracy of ± .00004,̎ they’re always right.
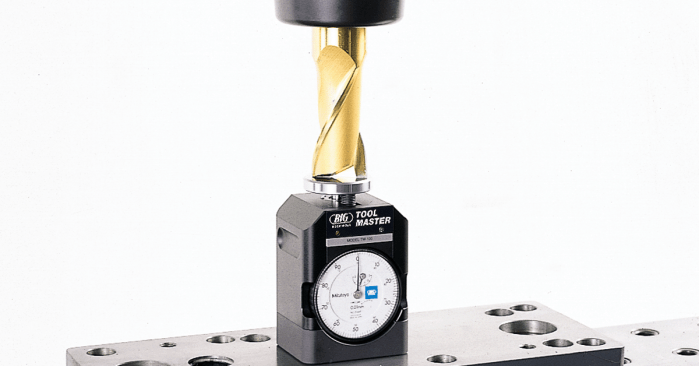
Tool Master
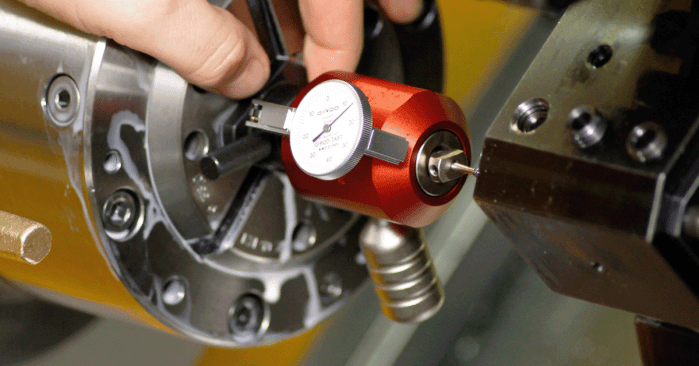
Dial gage sensors like this can be firmly mounted with a magnet and offers a large, easy-to-read dial for positioning cutting edges exactly right. References can be checked with a 100 mm setting gage.
Centering Tool
Lathes need careful setting up too and finding the true center is a common step in the process. The process can take an especially long time on a small lathe with tight spaces. This tool’s static dial gage simplifies centering because it stays in front of the operator and easy to read throughout adjustments.
Lathe Master
Any trial cutting you can eliminate is good, especially on an NC lathe. This round sensor plate helps measure external, internal and facing tools while in the lathe.
Large- and complex-part inspection
Measuring large or complex parts can be very difficult and time consuming. Odd angles and the shear distance that needs to be covered make manual measuring. It can even take more than one person to accomplish sometimes. We’re here to tell you it doesn’t need to take extra man hours or an in-machine probe to verify measurements at a late stage, when they have to be right.
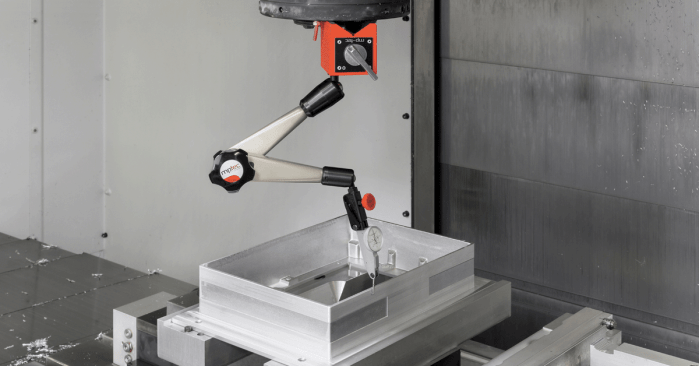
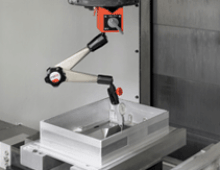
Dial Indicator Stands
This style of indicator acts like an assistant, drastically speeding up the inspection of parts. Five degrees of freedom are easily locked and released with a single star grip and controlled thanks to rigid construction. We offer magnetic indicator stands that can mount on machines, tables or parts and shank-type indicators that go in the spindle.
Get your numbers right, do it faster, and your operation will only improve. Explore our extensive lineup of measuring instruments. Many of the devices described here have variations for different applications or machine types.
Did you find this interesting or helpful? Let us know what you think by adding your comments or questions below.

Mark McCollough
Tue, 11/15/2022 - 20:44