6 Maintenance Musts to Keep Presetters Performing
Consistent accuracy is the name of the game when it comes to tool presetters. You need to trust the system in order to quickly and correctly build set-ups—and, in turn, reap the time-saving benefits of offline setup. The best way to ensure you can keep faith in your presetter, just like any other piece of machinery, is to perform regular maintenance.
These six steps can help ensure your presetter investment continues to pay you back.
- Cleaning, inspection and lubrication of all applicable parts of the machine. Lubrication helps the machine last longer while cleaning and inspection help to find worn parts that might be on the verge of failing and cause a down machine situation that would require emergency service.
- Inspection and adjustment of bearing preloads on X- and Z-axis slide assemblies. Most critical is the preload of the bearings. If the preload is not correct, then the camera will move off its focused centered position and give inconsistent and incorrect measurements.
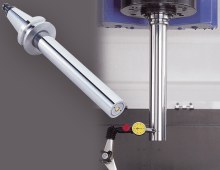
- Verification of spindle concentricity and column squaring to the spindle centerline with a NIST-traceable certified bar. Spindle concentricity [runout] and column squareness [tram] may cause either the tool or camera to not position correctly, causing inconsistent and inaccurate measurements.
- Cleaning and adjusting of mechanical and optical assemblies prolongs the machine life. Cleaning of the optics will improve measurement accuracy; dirty lenses cause inaccurate measurements. For instance, a spec of dust at 40x magnification is several ten thousandths of an inch.
- Performance evaluation and verification of all functions ensures that there are no bugs that could cause issue with machine operation. It also helps in finding potential control issues that could lead to the presetter being down, causing a loss in production.
- Verification of repeatability and zero-point calibration ensures that the machine will consistently measure accurately. If the machine will not repeat, then all measurements will be suspect. The zero-point calibration is what references the presetter to a known value—in this case our NIST-traceable standard is measured against the primary standard, which allows our values to be qualified to be used in their machining centers.
For most shops these checks are done once a year to keep up to date for their ISO certifications. High-volume shops will need to perform these maintenance checks at shorter intervals.
We do offer Speroni preventive maintenance service which includes all of these in addition to unlimited help desk support and counterweight cable and split nut repair kit as needed.
Curious how much setup time a presetter could save you? Give our Tool Presetter Cost Payback Calculator a try.
Did you find this interesting or helpful? Let us know what you think by adding your comments or questions below.






Add new comment